Magic in the Air

Monday, November 26, 2012

Beautiful Snowflake Decorations

You don't even know how excited I am that it's the holiday season!!! Oh how I love Christmas!!! It is most definitely one of my favorite seasons. The family time I get to spend, that special feeling in the air of warm-hearted-ness, all the yummy smells, baking, decorations, crafting, christmas movies.....ahh.....

-->
I cannot tell you how pleased with how these Christmas Snowflake Decorations turned out! I was cruising around and Pinterest and became inspired to do a fix up! I still now can’t believe how these turned out! Plus they only cost about $10 for everything! : )

Every year during Christmas time I LOVE going over to my best-friend’s house because her Mom always goes full out with the Christmas decorations. I love walking into their house and Christmas is seen all around. My friend and I always say that Christmas has puked in her house, hehehe. Every year when her Mom completely finishes decorating she texts me and says “It’s official, Christmas has puked in my house”. Ah….Okay getting to the point of the story! : )

Last Christmas while I was at her house, her Mom had all these adorable decorations and I continued to point out all the ones I thought were cute. The next week when I returned to visit she made a trip to the store and picked of multiple decorations for me to take home and decorate my house with! She’s so sweet! One of the best “otha momma’s” I’ve ever had! : ) Out of the many decorations she bought me, there were four specific decorations that I decided to “fix-up”. Four beautiful snowflake decorations. If not for Pinterest sharing all those beautifully creative people’s ideas I may have never come up with this idea!Oh Pinterest how I love you! Hehe.

So let's do this thing!

You will need:

- 4 giant plastic snowflakes (found at my local Dollar Tree)
- 1 can of white spray paint
- 1 can of spray glitter (I bought white and should have bought silver, so I recommend buying the silver if you do this!)
Old newspaper to spray snowflakes on


- If you don’t want to use the spray glitter or want more glitter do what I did and use either tacky glue mixed with a bit of water or Mod Podge and sprinkle the sparkles onto the snowflakes. If it's to cold and gloomy outside I'm sure something white acrylic paint would work just as well! : )

These snowflakes are beautiful without all the extra but I really wanted to take them the extra mile!

When the weather is nice enough, lay out some old newspaper outside to spray paint the snowflakes on. Spray one side and wait until dry, when one side is dry flip it over and spray the other side. Or you an decide after you’ve sprayed one side flip it over the other side before you spray it looks like it’s ice-y. However, I sprayed both sides.


When the second side has dried take the glitter spray and spray the side facing up until you are satisfied with the amount of glitter. Once again flip and repeat with the glitter spray.

Like I said above, I bought the wrong color of glitter spray so even though it was really beautiful but subtle, I plan on hanging these from my ceiling and wanted them to be noticeably sparkle-y. So we continue on!


When everything is dry bring the snowflakes inside and clear a space off on your table! Or, whatever workspace you choose. : ) Lay down enough newspaper to make sure you don’t muck up your table and place the snowflakes on top. On one side paint the surface with Mod Podge or tacky glue mixed with a bit of water. You may have to split the gluing into multiple parts since the snowflakes are large and you want everything to stick as good as the rest. After painting the glue onto the snowflake sprinkle with glitter. I used silver glitter but I think plain white glitter would be really pretty as well. Really any color would be very pretty, and you can use fine glitter or regular glitter. The possibilities are endless!!!! : ) After one side of glitter has dried flip over and do the same to the opposite side. When the snowflake is dry you’re ready to hang it on your wall or as I plan from my ceiling!


 Add glue and glitter....


 All done!!!!


I hope you guys try this out! Let me know how it went for you and what you did! I would love to hear!
  
Merry Christmas and happy crafting!!!

Tuesday, November 20, 2012

Simple Fried Spaghetti

I love this recipe! It is super simple, relatively cheap and can be made easily. All you need are a few ingredients: spaghetti, water (to boil the noodles), butter (or oil for frying), and seasonings. That’s it!

This recipe is really great for the night after you’ve made spaghetti with red sauce and you have leftover noodles. I don’t know maybe it’s just my family who makes WAY too many noodles, but if you guys are in the same boat as me this is the recipe for you! : ) If you don’t have any leftover noodles, just make some! All it takes is 15 minutes!

So lets begin!

I’m just going to start from the beginning in case you don’t have leftover noodles, if you do then just skip down a bit.

Being with boiling water, add about 2 teaspoons of salt or just salt your water until you feel it’s enough. : ) (I think it makes the noodles taste better.) Fun fact, contrary to old wives tales putting salt in water does not make it boil faster, however it does make the water boil hotter. 


Pot of water, turn to high heat, salt your water and stir.

 When the water reaches a roiling boil (I mean it an actual rolling boil, not simmer.) add the pasta. You can break the noodles in half or cook them whole. Do it however you usually do, I just like options! I cooked my noodles about 9 minutes however I used Linguine noodles in this tutorial but I usually just use normal spaghetti noodles.

Boiling water, breaking pasta, stirring, stirring, stirring, turn down burner to medium high.

After the noodles have finished cooking and you’ve strained them, begin warming a skillet over medium high heat with about a tablespoon of butter or oil. Add enough noodles to fill the pan. Usually I use Mrs. Dash Table Blend and Extra Spicy and some garlic salt. I highly recommend it!! If you can't afford it just add salt and pepper with some garlic powder to taste and toss the pasta in the skillet and fry until the noodles are glossy and a slightly warmer color.


Strain noodles, set skillet on medium high, add butter, fill bottom of pan with noodles, salt and pepper and cook until slightly glossy.

After you have finished, serve and enjoy! I like to eat my fried spaghetti topped with cheese. YUM! 


 Plate your finished pasta.


 Sprinkle some beautiful parmesan cheese over the top!


Viola!!! YUMMM!!!!


Fried Spaghetti

Leftover or new spaghetti noodles,
Mrs. Dash Table Blend & Extra Spicy seasonings
Garlic Salt
TBS. Butter or oil, for "frying" noodles in
Cheese for topping if desired.

Make spaghetti noodles as package directs. Heat pan over medium high heat an add TBS. of butter, add enough noodle's to fill the bottom of the pan (careful not to put too much). Season noodles evenly with garlic salt and Mrs. Dash Table Blend and lightly season with Mrs. Dash Extra Spicy, because it's just what it says. SPICY! When slightly glossy and the noodles are a warmer looking color plate, cover in cheese and enjoy!!

Want a video tutorial? Here is one I made! :)


Thursday, November 15, 2012

Easy Quesadillas


Easy Quesadillas

            * This recipe will be one of the many I plan on putting up that are inexpensive but still delicious and simple. Not everyone one (including me) can afford to break the bank to make delicious meals.

These quesadillas are super duper easy! Plus they only take about 5 minutes to make. The ingredients are inexpensive too. As a base all you need is: tortilla shells, refried beans, shredded cheese and seasonings. Yes, it’s no gourmet meal but its still tastes delicious. Simple ingredients, and great flavor is what this quesadilla is all about. Besides, the ingredients I listed are just the basic ingredients imagine the creative places you could go with this quesadilla. : )

I bought most of these ingredients for just under $2. I went to my local supermarket and got a big can of refried beans for about $1.79.  I also got two 10 count packages of medium size tortilla shells (medium size works perfect for about 2 people unless you are REALLY hungry.) and they were on sale for about a $1.12. The most expensive thing I had to buy because I didn’t already have at home was the bag of cheese, which was on sale for $6. The cheese I got was Mexican Four Cheese Blend and was pre-shredded. I like buying pre-shredded cheese because it’s easier and takes a little less time. I bought all this food for roughly $10 and I will be able to use the beans at least 3-4 more times for quesadillas, the cheese I will be able to use for any meals many times, and I bought TWO 10 count bags of tortilla shells which will make me all together 10 quesadillas (2 tortilla shells per quesadilla).

Plus these can also be a great way to use up leftovers. What I love to do is when I make this quesadillas, is if I have leftover meat from tacos is put it in my quesadilla, I think it’s better with the meat in there but I don’t always have leftover taco meat and I don’t always want to have to cook up another batch. I totally encourage you to go wild with whatever you like in your quesadillas.

Lets begin!

You will need: Tortilla shells, shredded cheese, refried beans, taco seasoning, chili powder, and ground cumin.


First you will need to remove two tortilla shells from you package, place one on your plate, spread enough refried beans over the tortilla shell until it is evenly covered.


This is the time you are going to add the seasonings on top of the beans, because I bought the “off brand” beans they are pretty bland and your going to want most the flavor there. This is also the time that you would add meat to your quesadilla if you have any. : ) I didn’t measure how much seasoning I put on my quesadilla I’d say just cover it with the taco seasoning and cumin evenly, and lightly cover the quesadilla with the chili powder. 


Next completely cover the quesadilla in cheese. 


Add the second tortilla shell on top. This is the part where you get to decide which way you would like to cook your tortilla. I like to make mine in the microwave because it’s fast and easy. However if you’d like to make yours in a pan just go ahead and put your quesadilla in the pan over medium heat and cook until cheese is completely melted.


 If you plan on making yours in the microwave like I do, follow me! : )

Place your plate with the quesadilla in the microwave and cook for 1 minute. After you remove it from the microwave wait a few minutes then cut and serve! : )


All done!!!

Again if you can think of using other things in this quesadilla I highly recommend it! When I have all the ingredients I really like to use refried beans, cheese, seasonings, olives and ground beef. Then after you take it out of the microwave (or off the stove) I like to dip in into sour cream.


Easy Quesadillas

2 tortilla shells
refried beans
shredded cheese (of your choice)
taco seasoning
chili powder
ground cumin

Take 1 tortilla shell and place on a plate. Cover tortilla shell evenly with refried beans and add taco seasoning and cumin evenly on the refried beans then lightly season with chili powder. After beans and seasonings are on the shell add cheese and spread a generous amount all over then top with 2nd tortilla shell, and microwave for 1 minute. Remove from microwave let rest about a minute then cut, serve and enjoy!!

Monday, November 5, 2012

My Favorite Chicken


I love cooking this chicken, because it’s super simple! The best part about cooking it is that you can season it however you want! I didn’t realize until I talked to people about how I love eating all types of meats, that people sometimes under season. My best-friend who isn’t much of meat fan, said she likes eating meat at our house because we use so much seasoning. I think that is one of the reasons people don’t really like certain meats, because it's under seasoned. I had some chicken once that was under seasoned and I wouldn’t like meat either if it was that bland. Bleck! 

However I am the season queen. I may even OVER season. I just feel like I’d rather have a little more seasoning that bland nasty food (only exception to this rule is to much salt.). I promise if you try this chicken you’ll like it! :) I make this chicken for my boyfriend all the time! (I was actually making it for him in these pictures :P) He loves it and says it tastes wonderful every time! :) 

Don't forget this chicken can be seasoned anyway, this is how my family likes it and its super yummy! So try this version then start experimenting. I also really like making this chicken with garlic salt and lemon pepper seasoning yum!

Lets get started! 

First things first, you’ll need a pan:


A cup with water,


Pour the water into the pan until it just fills the bottom, I don’t use any oil but I am also using a non-stick pan so I don’t need it. If you are using a different type of pan you may need to use a little bit of oil,


Add your chicken tenders,


Season with garlic salt (I use Lawry’s), and Mrs. Dash Table Blend and Fiesta Lime seasoning, and place lid on pan. When seasoning I don't measure just cover the chicken evenly and make sure it is completely covered with all the seasonings as picture below.


(I ran out of the Table Blend so it is not pictured.)

  
 Garlic salt, 


 Table blend and Fiesta Lime,


Put lid on pan and let cook on one side on medium to medium high (6 on my stove is perfect) for 7-8 minutes the water should be at a simmer, after the chicken should look white, its ready to flip, (as in the picture below),


 Flip over and season lightly with the garlic salt, table blend and fiesta lime again. (As you can see picture below don't use as much seasoning as the first time.)


Cook on the other side for about 6 minutes (with lid on). After water should have mostly evaporated. When the chicken is broken into it should look white in the middle. If it is still pink cook a couple more minutes.


After the 6 minutes your pan should look like this, the water is gone. (Above) Take out of pan, serve and enjoy!


All done! 


Look how juicy that chicken is, yum!


My Favorite Chicken Recipe

Package of chicken tenders (about 8 tenders per batch),
Garlic salt,
Mrs. Dash Fiesta Lime,
Mrs. Dash Table Blend
Water

Put pan on stove and turn heat on to medium to medium high (6 is perfect on my stove). Add enough water to the pan so the water just fills the bottom of the pan. Add your chicken tenders and season one side completely with garlic salt, Mrs. Dash Table Blend and Fiesta Lime. Put lid on pan and let cook on that side for 7-8 minutes. After, the chicken should no longer look pink the outside it should be white, flip the chicken now. Lightly season with the garlic salt, Table Blend and Fiesta Lime on the second side. Put lid back on pan and cook second side for about 6 minutes, the water should be evaporated and when the chicken is broken into it should be white. Take out of the pan and serve! Enjoy

*Tips*

If the chicken is white in the middle but slightly juicy looking it is okay to take out of the pan a wait a couple minutes before serving. The chicken will continue cooking after you take it out of the pan. 

I always make this chicken in bulk for my boyfriend and cooking it this way leaves it moist for leftovers or other meals. We like to put a little bit of water on the chicken then put it in the microwave for a little bit so it stays moist when warming it up. Because they are tenders 30 seconds does the job for about 2 tenders in our microwave. 

I would love to hear what you guys did differently and if you liked it! :)   

Friday, November 2, 2012

Cheesy Vegetable Soup


Man, this soup is gooood! You seriously have to try it. It is especially great for these chilly fall and winter months. It's the kind of soup that sticks to your ribs.
  
I first pinned this recipe on Pinterest because I love broccoli cheddar soup and that’s what this soup reminded me of. After making it twice I’m glad to say that I can tell you how I did it. However, I am a firm believer in tweaking until you find what way you and your family like best! Seriously though, the first time I made this soup I planned on following the recipe….but it ended up more like a guideline : ) So I strongly encourage you to make it your own! That’s the wonderful thing about cooking, unlike baking that sometimes has to have the right amount of this or that, or your cake is rubbery and gross. Cooking however, often times can be tweaked and made your own fairly simply.

If you want to try out the original recipe it can be found here: http://luluthebaker.blogspot.com/2011/09/cheesy-vegetable-chowder.html

Now, on to how I make mine! : )

First things first we want to prep all the veggies, what I did was chopped up the carrots, celery, and food processed the onion (my eyes are super sensitive to the onion and I cry the whole time to the point where I can’t see anymore…). After I put all those into a separate bowl I moved on to cutting up the broccoli. When the broccoli is all chopped I begin sautéing the onion, celery, and carrots in butter in the bottom of my soup pot. I also added some garlic salt and pepper to the sautéing vegetables.


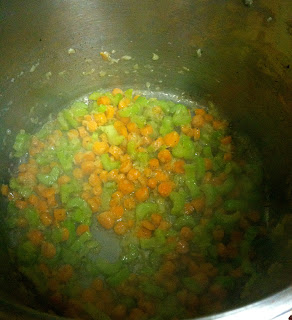
 Carrots, celery and onion sauteing
 
 I sautéed the celery, onions and carrots for about 10 minutes or more or until they were tender. This picture was from last night’s dinner. Next time I plan on chopping them and then either cutting them in halves or thirds. I love the flavor the celery gives the soup and I want it in there, but I really wanted them to be soft and not very grainy.

While the celery, onion and carrots are sautéing you’ll want to peel and cube the potatoes. If you feel like you won’t have the time to while the other veggies are sautéing, you can just peel and chop the potatoes when you chop up the other veggies. I just started to feel like ahh! I need to start this thing soon and I’ve been chopping forever! So I waited to work on the potatoes so I could start the soup.

After the celery, onions and carrots are done you add four cans of chicken broth to the sautéed vegetables and the garlic powder. After the broth and garlic powder is in the pot you add the potatoes and cook them until they are tender. Cooking the potatoes didn’t take as long as I thought they would, so just keep an eye on them. You'll know they are ready when you can easily stick a fork in them. : )  At this time also add the water and flour mixture.


 Potatoes, broccoli, milk and water added.

Once the potatoes are done, add milk and the chopped broccoli to the soup and cook for about 10 minutes. After add cheddar cheese, and wait until everything is heated through. 


Cheese added. Heating through.


These times are just rough estimates, if you feel something is done before, feel free to move on! I also added garlic salt and pepper through out cooking the whole meal just be careful not to over salt. 


 YUMMMM!!!!


Cheesy Vegetable Soup
(Adapted from Cheesy Vegetable Chowder links above)

2 TBS butter
½ large onion or 1 whole small onion, processed or minced
1 ½ - 2 cups chopped baby carrots (or regular carrots chopped smaller)
2-3 celery stalks chopped into halves or thirds
4 (14 oz.) cans chicken broth (low sodium would probably be fine, you could also use vegetable broth too)
4 medium sized potatoes or 2-3 large ones, peeled and cubed
2 TBS flour
1 cup water
3 cups or roughly 1 1/2 heads of broccoli
2 cups milk
3-4 cups shredded cheddar cheese
1 teas. garlic powder (or a clove of garlic minced. I prefer powder over raw for a more subtle flavor, if using raw garlic sauté with carrots, celery, and onion when the other vegetables are almost finished add the minced garlic)
Salt and pepper to taste (I used garlic salt and LOTS of pepper)

Prepare chopped and diced vegetables. Sautee onion, carrots and celery until tender, while vegetables are sautéing peel and cubed potatoes. When done add chicken broth, potatoes, garlic powder, mix water and flour and add to vegetables. Cook until potatoes are tender. When ready add chopped broccoli, milk and cook 5-10 minutes. After add cheese, heat through and serve. Salt and pepper to taste. Enjoy!!!